This is my very 1st tutorial, hopefully they'll get better as I go along. :-)
This tag was made with the FTU kit called My Fantasy by
Larcolita's Designz. Get the kit
here, it's near the bottom. She has some truly amazing kits!
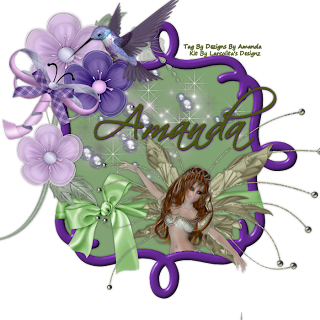
~~~~~~~~~~~~~~~~~~~~~~~~~~~~~~~~~~~~~~~~~~~~~~~~~~~~~~~~~~~~~~~~~~~
First you will need to open the My Fantasy frame. Click on the magic wand & click inside the frame in all open spaces to get the marching ants.
Go to Selections, modify & expand by 2.
Leaving the selections on that layer, open a new layer & flood fill with color of choice.
Selections, select none.
Move this layer below the frame layer.
Open the Decoration 1 image, copy & paste as new layer onto tag. Position as desired.
Open the Bird 2 Image, resize by 50%, copy & paste as new layer onto tag. position as desired.
Open the Dust 1 image, copy & paste onto tag. Position as desired.
Open the Dust 2 image, & do the same as with dust 1 image. Position as desired.
Open the Faerie image, copy 7 paste as a new layer onto the tag. Position her as you want her. Some of the image can be out of the frame, it will be removed later.
Click on the eye on the Faerie layer to disable it. Find the frame layer, choose the freehand selection tool. Trace the inside edge of the frame where the faerie is and covering the part of where the faerie is that needs to be removed. Go back to the faerie layer and click the eye again to enable the image. Now hit delete on your keyboard, this should remove the part of the image that isn't inside the frame. Adjust the image as needed.
Add a new layer, and choose the size, font, & color you wish to use. Add your name. I made mine with two separate layers, both with a different color to give a little more depth.
Now go through each layer and give them all a dropshadow. Go to Effects, 3D Effects, Dropshadow. You can use whatever setting you prefer, but my setting were:
vertical / horizontal - 0
opacity - 50
blur - 6.00
color - black
Now just be sure to add credits to your tag before saving! :-)
~~~~~~~~~~~~~~~~~~~~~~~~~~~~~~~~~~~~~~~~~~~~~~~~~~~~~~~~~~~~~~~~~~
Hope you enjoy & let me know how I did on my 1st tut! Hugs!


